
Hey there, fellow engine enthusiasts! I'm a supplier of crankshafts, and I know firsthand how crucial a well - functioning crankshaft oil seal is for your engine. In this blog, I'm gonna walk you through the process of replacing a crankshaft oil seal.
Why Replace the Crankshaft Oil Seal?
First off, you might be wondering why you even need to replace the crankshaft oil seal. Well, over time, the seal can wear out, crack, or get damaged. When this happens, oil can leak out of the engine. An oil leak not only makes a mess but can also lead to a drop in oil levels. Low oil levels can cause serious engine problems, like increased friction and overheating. So, it's super important to keep an eye on your oil seal and replace it when needed.


Tools You'll Need
Before you start the replacement process, you'll need to gather some tools. Here's a list of what you'll typically need:
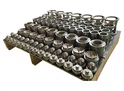
- Socket set: You'll use this to remove bolts and nuts. Make sure you have a variety of sizes.
- Seal puller: This tool is essential for safely removing the old oil seal without damaging the surrounding parts.
- Gasket scraper: To clean the surface where the new seal will be installed.
- New crankshaft oil seal: Of course, you need a replacement. As a crankshaft supplier, I can tell you that it's important to get a high - quality seal that fits your engine perfectly.
- RTV (Room Temperature Vulcanizing) sealant: This helps create a tight seal and prevents leaks.
- Torque wrench: To tighten the bolts to the correct specifications. Over - tightening or under - tightening can cause problems.
Step - by - Step Replacement Process
Step 1: Prepare Your Workspace
First things first, find a clean and well - lit area to work in. Make sure your engine is cool before you start. You don't want to burn yourself on a hot engine part. Disconnect the battery to avoid any electrical hazards.
Step 2: Remove the Necessary Components
You'll need to remove some parts to access the crankshaft oil seal. This might include the timing cover, harmonic balancer, or other components depending on your engine. Use your socket set to carefully remove the bolts and nuts. Keep all the parts organized and in a safe place so you don't lose anything.
Step 3: Remove the Old Oil Seal
Once you have access to the oil seal, use the seal puller to gently remove it. Be careful not to scratch or damage the crankshaft or the housing. If the seal is stuck, you can use a little bit of penetrating oil to loosen it up.
Step 4: Clean the Surface
After removing the old seal, use the gasket scraper to clean the surface where the new seal will be installed. Remove any old sealant, dirt, or debris. A clean surface is crucial for a good seal. You can also use a clean rag and some solvent to give it a final wipe down.
Step 5: Install the New Oil Seal
Before installing the new seal, apply a thin layer of RTV sealant around the outside edge of the seal. This helps it stick in place and prevents leaks. Carefully place the new seal into the housing, making sure it's properly aligned. You can use a seal installer or a block of wood and a hammer to gently tap the seal into place until it's flush with the housing.
Step 6: Reassemble the Components
Now that the new seal is installed, it's time to put everything back together. Reattach the components you removed earlier, like the timing cover and harmonic balancer. Use your torque wrench to tighten the bolts to the correct specifications. This ensures that everything is secure and won't come loose during operation.
Step 7: Check for Leaks
Once you've reassembled everything, refill the engine with oil. Start the engine and let it run for a few minutes. Check for any signs of oil leaks around the new seal. If you see any leaks, you might need to double - check the installation or replace the seal again.
Related Parts and Links
If you're working on your engine, you might also be interested in some other parts. For example, the Ni - Aluminum Bronze Liquid Cylinder is a great option for your engine's pumping system. It's made of high - quality materials and can improve the performance of your engine.
Another useful part is the Washer, Stuffing Box (Separation Ring). This part helps to keep the stuffing box in place and prevent leaks.
And if you need an intermediate rod, the Intermediate Rod (Screw Or Clamp Type) is a reliable choice. It's designed to be durable and work well with your engine.
Conclusion
Replacing a crankshaft oil seal might seem like a daunting task, but with the right tools and a little bit of know - how, you can do it yourself. Remember, it's important to take your time and follow the steps carefully. If you have any questions or need help finding the right parts, don't hesitate to reach out. As a crankshaft supplier, I'm here to assist you with all your engine part needs. Whether you're a DIYer or a professional mechanic, I can provide you with high - quality crankshafts and related parts. So, if you're in the market for new parts or have any questions about the replacement process, feel free to contact me for more information and to start a procurement discussion.
References
- "Automotive Engine Repair Manual" - A comprehensive guide for engine repair and maintenance.
- Manufacturer's specifications for your specific engine model. These can usually be found in the owner's manual or on the manufacturer's website.